Showing posts with label Graphic 45. Show all posts

Sunday, June 22, 2014

Something Tattered Pan Pastel Technique with Colorbox Pigment Inks


Hi everyone, so I am working on conquering my fear of stamping- I love stamps and have quite the collection- but that's where it tends to stop. I collect and admire them but don't use them as much. I think my fear is imperfection- but I think some imperfection is what gives stamps their character- so I am getting over it! I am getting over that fear by really challenging myself by learning new techniques and them applying them to my favorite stamps. Today we are going to do a little pan pastel effect using Gelatos. Here is the finished project and at the end my technique video!


SUPPLIES:
Canson Watercolor Paper
Canson Linen Paper

Thursday, January 30, 2014

Xyron and Graphic 45 Couture Corset Banner from Scratch


So what is crafting from Scratch? For me it means I create my own base- whether that be a box, a mini album, or whatever! I guess it's the opposite of altering where you take something already made and alter in your own style. I wanted to make a banner using Graphic 45's Couture collection and at first was going to make a string of dresses- but as I did my Google image search, I found some very cute corsets. If you think you are terrible at drawing- your not alone! I am a disaster, but when I find something I want to make the shape of, I just grab a pencil and go for it. I tend to make one side better than the other- no problem, just draw a line through the middle and cut the good half out. Flip it over and trace the good side, then flip again and trace to create one perfect piece. Works every time. I also have another great tip for using my Xyron Creative Station. Instead of cutting out my base chip board, then my paper, then adhering them. I just make one piece a little bigger than my template- adhere my paper to the chipboard, then trace and cut out. Want to see what I mean? Here is a tutorial of the whole project:

{I use Google image search to find the silhouette that I want. I just free hand drew it, then using the technique I told you about made tow even sides and traced into one}

{The I cut out 3 pieces of chipboard making sure my template would fit on each one}

{I chose my Graphic 45 Couture Prints and cut them same size as my chipboard}

{Then I ran the cardstock through my Xyron 5 Inch Creative Station with permanent adhesive}

{after I attached all of the cardstock to the chipboard, then I traced out and cut my corsets out- so easy, no matching the edges!}

{Ink it up! I am using Donna Salazar Mixed Media Chox on Bluejay and Black}

{Now take those little scraps and cut your self some shoulder straps- optional you don't have to make straps}

{I used Xyron high tack tape to attach my straps}

{now comes the fun part! Embellish away! Use bits of lace and trim. I used Xyron High Tack Tape for my trims but used hot glue for some of my heavier trim like this pearl}
{tip: Don't worry about your high tack tape getting wrinkled going around edges- it will flatten out when you add the trim}

{see!}

{I used some Recollections brads to make this little lace up detail-so cute!}


{Now I needed some clothespins to attach to my line-so I distressed these mini pins with Colorbox Spritzer in Mudslide}

{I then hot glues some vintage buttons on}

{after I hung them, I wanted a little extra, so I made these tags for each using Graphic 45 Couture Chipboard tags and some twine from May Arts}

{Now to assemble-just attach to more twine. This would look so cute on a closet door or at you make up table mirror.  Below I am adding in some detail pics for you, so you can see how I embellished them all. I hope you will have fun making something from scratch today!
-Denise


Monday, January 6, 2014

On the Graphic 45 Blog today- Welcome Botanical Tea!


Wow first post of the New Year! It's kind of a crazy time in the craft industry as the biggest trade show of the year is coming this weekend. So just when everyone is packing up their decorations and working on their New Years resolutions- crafters are creating away for Spring Summer! Today Graphic 45 is sneak peeking one of their new line Botanical Tea. I am in love with this line, it has all the vintage charm but includes some polkadots and strips, some of my classic favorite prints! Oh and the Victorian Tussy Mussy I swapped during Christmas is also featured! Click here to see them!


Thursday, November 14, 2013

A Very Personal Craft Project


Today on Graphic 45's blog I am sharing a very personal project. I had my Dads glasses after he passed away in just a little shadow box sitting on a shelf in my Craft room. I decided to make more of a memory box shrine for them and you can see it on G45's blog today HERE!


Sunday, November 3, 2013

Handmade Holidays Blog Hop- Toilet Paper Roll Gift Card Holders


Hi everyone welcome to the hop! I wanted to make a project that was super compatible with using all of the great companies featured today on the hop- so although I didn't use everyone of them- I am adding in some ideas and options that you can use all of your stash for! Let's start by saving all of the toilet paper and paper towel holders. So many cool crafts to make with them! I manage a grocery store in real life-so I am not a holiday shopper-it's gift cards for all. However I do like to give those cards in a unique and fun gift card holder-handmade with love!

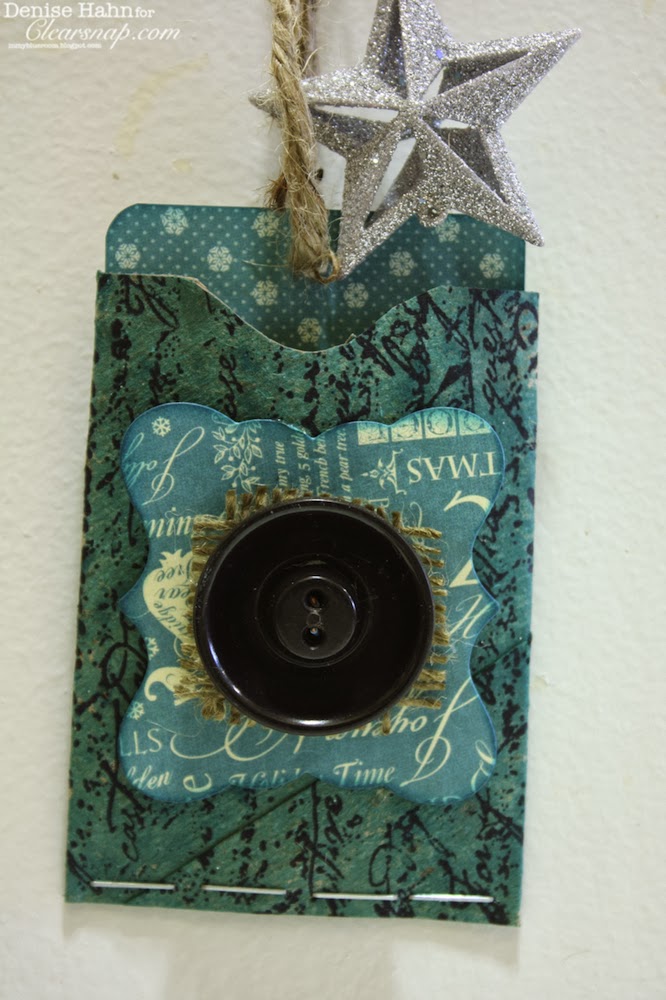
{Can you believe these are toilet paper rolls! I left mine au naturale before I sprayed them with new iZink Pigments. These are imported all the way from France and are being distributed by Clearsnap. You can use any of your sprays including- Stephanie Barnard, and Colorbox Spritzers}

{a single roll will make one holder, a paper towel holder will make 3- just eyeball cutting it into thirds. Flatten and press down with a bone folder- you can seal bottom edge with any glue or adhesive or use a stapler. If you want more true colors and a less rustic look-paint your rolls with a white acrylic base before you spray.}

{For this one i used iZink Tomato. Just drop a few drops with a little water in a spray bottle and spray away. I then used Colorbox Pigment Ink in gold and My First Colorbox Stamps "Snow Day". Use your favorite Sizzix die cut- the Framelits will work awesome. I edged my Graphic 45 die cut shape with Donna Salazar Mix'd Media Inx in Schoolhouse. I layer on a small piece of burlap to echo that natural look then added a vintage button all with hot glue}

{this one is iZink in Opaline-then stamped with the My First Colorbox stamp- I used a stapler to seal up the bottom of this one}

{This one is iZink inTurquoise then stamped with black pigment ink using my Clearsnap Rollagraph "Word Words"}

{this one is iZink in Silver and I used Donna Salazar Mixed Media Inx in Schoolhouse with a Colorbox Art Dauber to make the dots-love these!}

{To finish them all off I used the leftovers from the die cut- cut them 2.5 inches wide and about 4 inches long-inked them in coordinating colors using Colorbox Queties. I used some plain jute twine for the tie}

{I used Graphic 45's 6x6 12 Days of Christmas paper pad. The backs are all solid to make sure you have room to write on your gift card. To attach your gift card just use your tape runner or a glue dot!}


{These little carriers can be hung from a tree too! Hope you have a great handmade holiday!}
4 More blogs to go- you can do it!!!!
Sizzix – Eileen Hull Designs http://eileenhull.blogspot.com/
Nathalie Kalbach www.nathaliesstudio.com
Tanner Bell   http://www.craftteen.com
Jennifer Priest http://hydrangeahippo.com
Vicki O'Dell http://vickiodell.com/
Denise Hahn http://inmyblueroom.blogspot.com/ <----------you are="" here="" span="">
Courtney Chambers http://www.alittlecraftinyourday.com <------go courtney="" here="" next="" span="" visit="">


{\rtf1\ansi\ansicpg1252 {\fonttbl\f0\fmodern\fcharset0 Courier;} {\colortbl;\red255\green255\blue255;\red0\green0\blue0;\red254\green254\blue254;} \deftab720 \pard\pardeftab720\sl360\partightenfactor0 \f0\fs24 \cf2 \cb3 \expnd0\expndtw0\kerning0 \outl0\strokewidth0 \strokec2 a Rafflecopter giveaway\ } 

Monday, October 14, 2013

Stencil Girl and Xyron Blog Hop- Halloween Tag Mini Vid Class today!


Stencils are super versatile and I was so excited that we were teaming up with Stencil Girl! I got the Net Stencil designed by owner Mary Beth Shaw, however if you check out Stencil Girl you will see tons of amazing stencils created by Artists from all areas of art- that means there is a style for everyone. Even though my Stencil was a Net- the first thing I saw in it was Alligator skin. So I decided to use a technique that made the stencil look more alligator-y; embossing. Here are the tags I designed and at the end you will find a Mini Video Class including the technique for gluing over a stencil! Have fun making all those Halloween Projects and don't forget to HOP over to:


{look at that fabulous black embossed alligator skin!}


{I like to emboss over patterned papers to give that extra depth- embossing over a small pattern works best}


Supplies:
Stencil Girl Net Stencil
Xyron 5 Inch Creative Station
Xyron High Tack Adhesive
Xyron Adhesive Glue Dots
Authentique Thrilling Papers and Stickers
Graphic 45 Chipboard Tag Steampunk Spells
Petaloo Vintage Dazzlers Tags
Petaloo Textured Minis x9 Black
Petaloo Fancy Trims Black and Paprika
Embossing Powder: Zig and PK Glitz
Clearsnap Top Boss Adhesive Pad
Colorbox Art Daubers
Colorbox Pigment Stamp Pad Lava Black
Crepe Paper- Party City
Black Tag- American Tag Co.