Showing posts with label clearsnap. Show all posts

Friday, October 3, 2014

Easy Recipe for World Card Making Day

World Card Making Day 2014 with the Clearsnap Creative Team

Today is a fun day for The Clearsnap Creative Team- World Card Making Day! Celebrating its ninth year in 2014, World Card Making Day is celebrated annually on the first Saturday in October. It's a day for the card-making communityhobbyists, retailers, and manufacturersto unite and celebrate the connection and creativity that is the heart of card making.  Make sure you check out the Official World Card Making Day site to submit your work and enter to win an amazing prize pack from the WCMD 2014 sponsors (like us!).
Today I am sharing an easy recipe for the beginner card maker. Why call it a recipe? Think of card making as cooking. If your just learning you want to start with an easy recipe. As you grow more confident, you will add in a few tweaks to that recipe. After you have really mastered it, you will start making "dishes" of your own.  Clearsnap has an awesome product for the beginner; Colorbox Creative Cards. Simply decorate the pre-printed cards by spraying or stamping over the design then layering embellishments onto dry card. The best part is you get 5 preprinted cards (5 1/2" x 4 1/4" folded) and 5 blank envelopes. Here is the recipe:
1) Choose 3 or more Colorbox Stamp Pads (all of them will work!) and using a Colorbox Stylus tool and tip- blend onto the card starting with the darkest color on bottom and work your way up blend in as you go
2) Take 1 Yard of Bakers Twine (I use The Twinery) and wrap around card top and tie in a bow on the side
3) Choose a Focal Piece- this can be a Stamp on plain cardstock- a chipboard from a scrapbook paper collection, or even a sticker. Add foam squares to pop it out, and attach to the center of your card. A focal piece should take up around 1/3 of the card space
And that's it! Let me walk you through these three very different cards, that are actually all the same.
{for this card I used a die cut from Authentiques Thrilling collection. The Inks are Donna Salazar Mixed Media Chox in Butternut and Adobe. And Colorbox Chalk in NEW Harvest. The edging is a Colorbox Cats Eye in Wicked Black}


{This Card uses all Colorbox Crafters Inks in NEW Sunshine, Limelight form the Ann Butler Collection, along with  Aruba and Sweet Pea. The stamp (from the dollar bin at Michales) is stamped in Berry}

{As an extra detail- adding in the twist on the recipe- some Smooch Glitz in Pink Fizz on the candle flames}


{For this one a did another twist on the recipe. The Focal sticker I chose from Authentique Be-You-tiful Collection was big and covered the twine, so I moved it up and the twine down- then added in a little Petaloo Flower. I chose some metallics for this one; Starting at the bottom with Crafters Ink in Stone, Colorbox Pigment Ink in Silver, and finally some Twinkle in Pearl}


{This is what the plain Creative Card looks like before getting all inked up}

{Creative Cards comes in all different designs just waiting for you to cook something up for World Card Making Day!

Continue on the hop by visiting these team members' blogs! Leave a comment on each and use the widget below to enter to win a prize pack just for Clearsnap followers!!

  Clearsnap Blog
  Denise Hahn (You are here)
  Meihsia Liu (Go here next)
 Vivian Keh
  Steph Ackerman

Enter our giveaway here (and happy hopping!!):
  a Rafflecopter giveaway

-Denise

Thursday, September 18, 2014

Clearsnap and Fancy Pants Blog Hop Embossed Mini

Oh how I fell in love with Fancy Pants! Today I am working with their Burlap and Bouquets Collection Kit. Visit Clearsnap at HERE and Fancy Pants HERE for more inspiration!

I added to that kit some of their Chalkboard stickers and Tape. The stickers have the texture of electrical tape and I knew right away the best way to use these awesome embellishments- embossing!
{This mini is constructed with drink coasters- the corrugated cover is Fancy Pants Kraft Corrugated Paper}

{This cover is a Fancy Pants Scallop Bracket Chalk Label Sticker, White Clearsnap Pigment Ink and Clearsnap White Embossing Powder- the Stamp is Hampton Art- Footloose}


{For this embossed Bracket Chalk Label Sticker used Clearsnap Top Boss Embossing Adhesive Stamp Pad and Clearsnap Gold Embossing Powder}


Supplies:
Burlap and Bouquets:
Other:
Poppy Stamp- Bicycle
Ribbon May Arts
Adhesives:
Xyron Mega Runner
Xyron Create A Sticker Max


Sunday, June 22, 2014

Something Tattered Pan Pastel Technique with Colorbox Pigment Inks


Hi everyone, so I am working on conquering my fear of stamping- I love stamps and have quite the collection- but that's where it tends to stop. I collect and admire them but don't use them as much. I think my fear is imperfection- but I think some imperfection is what gives stamps their character- so I am getting over it! I am getting over that fear by really challenging myself by learning new techniques and them applying them to my favorite stamps. Today we are going to do a little pan pastel effect using Gelatos. Here is the finished project and at the end my technique video!


SUPPLIES:
Canson Watercolor Paper
Canson Linen Paper

Wednesday, March 26, 2014

Not Xyron, but should be! DIY Glass Candle Luminary

This week we were tasked with choosing a cool Pinterest project that was not made using Xyron Adhesives- but should be. We were to use the project as inspiration for our own creation and the second I saw those washers, I knew they were calling my name! Why you ask? Because my husband is a hoarder of tools and supplies. I only say that in a half joking way, because he does truly have an acknowledged problem. One of the things that drives me crazy is he always buys 3 or more of things. ALWAYS! So I KNEW I would have a major stash of washers somewhere in our garage. And sure enough he said we did- and gently set a package of washers on my craft table. However the next day- lo and behold he has bought me three more packages of 3 different sizes. Hoard Prevention FAIL! What can I say, I love the dude? here was my Pinterest Inspiration-


{I used Clearsnaps Designer Foils to color the back sides of the washers}


{Looks amazing my bathroom, and I got a "that's pretty cool" from Hubby}
{ I of course used my Xyron Create A sticker to make it! Want to see how, just watch this Snapguide!}

Check out How to Make a Glass Luminary With Metal Washers by Denise Hahn on Snapguide.

Sunday, November 3, 2013

Handmade Holidays Blog Hop- Toilet Paper Roll Gift Card Holders


Hi everyone welcome to the hop! I wanted to make a project that was super compatible with using all of the great companies featured today on the hop- so although I didn't use everyone of them- I am adding in some ideas and options that you can use all of your stash for! Let's start by saving all of the toilet paper and paper towel holders. So many cool crafts to make with them! I manage a grocery store in real life-so I am not a holiday shopper-it's gift cards for all. However I do like to give those cards in a unique and fun gift card holder-handmade with love!

{Can you believe these are toilet paper rolls! I left mine au naturale before I sprayed them with new iZink Pigments. These are imported all the way from France and are being distributed by Clearsnap. You can use any of your sprays including- Stephanie Barnard, and Colorbox Spritzers}

{a single roll will make one holder, a paper towel holder will make 3- just eyeball cutting it into thirds. Flatten and press down with a bone folder- you can seal bottom edge with any glue or adhesive or use a stapler. If you want more true colors and a less rustic look-paint your rolls with a white acrylic base before you spray.}

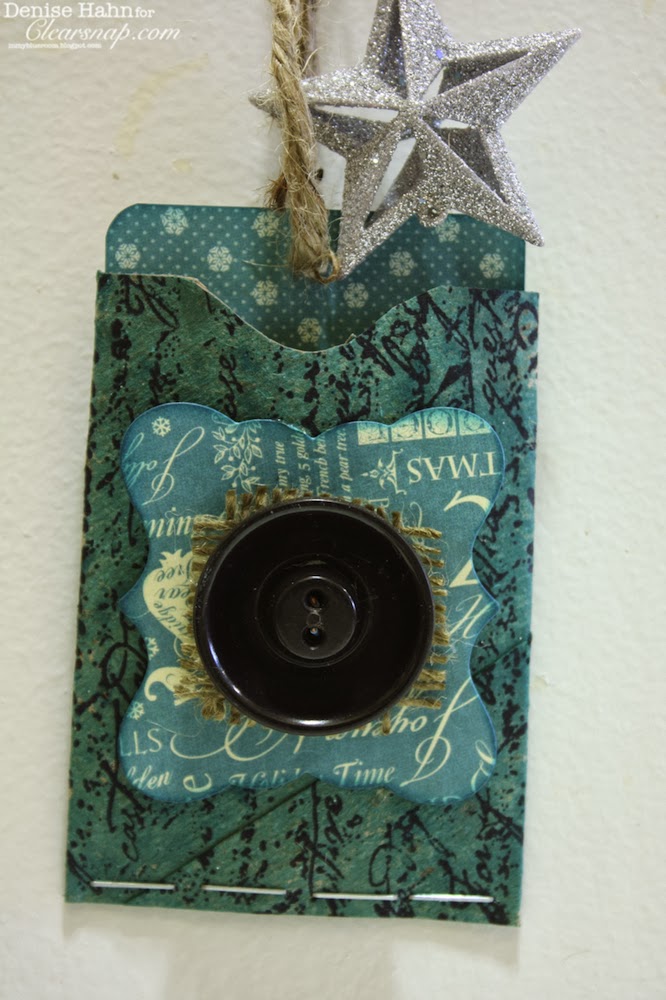
{For this one i used iZink Tomato. Just drop a few drops with a little water in a spray bottle and spray away. I then used Colorbox Pigment Ink in gold and My First Colorbox Stamps "Snow Day". Use your favorite Sizzix die cut- the Framelits will work awesome. I edged my Graphic 45 die cut shape with Donna Salazar Mix'd Media Inx in Schoolhouse. I layer on a small piece of burlap to echo that natural look then added a vintage button all with hot glue}

{this one is iZink in Opaline-then stamped with the My First Colorbox stamp- I used a stapler to seal up the bottom of this one}

{This one is iZink inTurquoise then stamped with black pigment ink using my Clearsnap Rollagraph "Word Words"}

{this one is iZink in Silver and I used Donna Salazar Mixed Media Inx in Schoolhouse with a Colorbox Art Dauber to make the dots-love these!}

{To finish them all off I used the leftovers from the die cut- cut them 2.5 inches wide and about 4 inches long-inked them in coordinating colors using Colorbox Queties. I used some plain jute twine for the tie}

{I used Graphic 45's 6x6 12 Days of Christmas paper pad. The backs are all solid to make sure you have room to write on your gift card. To attach your gift card just use your tape runner or a glue dot!}


{These little carriers can be hung from a tree too! Hope you have a great handmade holiday!}
4 More blogs to go- you can do it!!!!
Sizzix – Eileen Hull Designs http://eileenhull.blogspot.com/
Nathalie Kalbach www.nathaliesstudio.com
Tanner Bell   http://www.craftteen.com
Jennifer Priest http://hydrangeahippo.com
Vicki O'Dell http://vickiodell.com/
Denise Hahn http://inmyblueroom.blogspot.com/ <----------you are="" here="" span="">
Courtney Chambers http://www.alittlecraftinyourday.com <------go courtney="" here="" next="" span="" visit="">


{\rtf1\ansi\ansicpg1252 {\fonttbl\f0\fmodern\fcharset0 Courier;} {\colortbl;\red255\green255\blue255;\red0\green0\blue0;\red254\green254\blue254;} \deftab720 \pard\pardeftab720\sl360\partightenfactor0 \f0\fs24 \cf2 \cb3 \expnd0\expndtw0\kerning0 \outl0\strokewidth0 \strokec2 a Rafflecopter giveaway\ } 

Thursday, October 31, 2013

Bringing Instagrams Alive with Maya Road and Xyron (and $10 off Prinstagrams!)


Do you remember the good old days when you popped a roll of film in your camera, no previews, you got what you got? You took the film down to the local grocery store and dropped it off? You excitedly returned, flipping through the alphabetical order packets to find your 3x5's? A lot has changed! I can tell you I have 14, 437 photos on my computer and maybe a handful I have actually printed! I was recently able to recapture that excitement as I decided to get some of  my Instagrams printed for the first time. I researched and decided on Printstgram. I downloaded the app to my phone and it easily walks you through the ordering process. Getting them in the mail was almost as exciting as running to the grocery store! I laid them all out in their glory and they created the perfect palette for my Maya Road Album. AND PRINSTAGRAM / Social Print Studio IS GIVING ALL OF MY BLOG READERS $10 their first order !!! Yep! Just pop them an email at hello@socialprintstudio.com and tell them "Xyron Sent Me!" and Jenny will send you the promotional code! I got 48 of the 2.5X2.5 Mini prints and after shipping was around $20- so yours will be around $10! What a deal!


 Sometimes facing blank chipboard can be a little intimidating-so I used the photos as my guide for color and composition- So come along and see how my little Prinstagrams and my Xyron 2.5 Inch Create-A-Sticker have become my new match-made-in-heavan favorite technique (see video)!
{I started with the Maya Road 3 Ring tab book}

{For the cover I used Maya Chipboard Alphas "Lisa" that I dyed using Donna Salazar Mixed Media Inx in Schoolhouse Red- also on the page Maya Road Heart Tins and Maya Road Our Town Transparencies Black. You will also see a little October Afternoon paper and Alpha Stickers in there too}

 {My entire chipboard Album was painted in Acrylic paints first. I then added depth by rolling my Clearsnap Roll-A-Graph Word Words-using grey Pigment ink}
{Inside I glued down my paper then coated it with Diamnd Glaze-I cut out the little heart from some craft store sheet cork- I made my own little Red Stick pins. I just dipped them in Surfacez red ink, and snipped them to size. I snuck in a little Petaloo Mini Daisy in Grey}

{I used a Martha Stewart Punch for the snowflakes then I embossed them in black}

{At first I was perplexed about how to use the little buildings-but transparencies were made to go over hand painted backgrounds! With My Xyron Create-A-Sticker you can't even see the adhesive can you?! Also on this page is some Washi sticker paper from We R Memory Keepers.}

{When I was done, I noticed my book was kinda flat! I like my albums to have a little chunk to them! So I sniped some little chevron straws and used them in between the pages to make them stand up better-then I used them on the outside binding ring to keep my embellishments forward}

{here I used Maya Road Love Chipboard Banners  and Arrow Pins covered in the We R Memory Keepers Washi paper. Don't Forget to decorate with your sharpie!}

{I loved using the little Washi Tape accents like they are holding on the photos}

{That's a Smashbook paper clip}


{I added the Petaloo Flowers after I was done, they added a touch of softness and femininity to the album}

{The tape and sticker are Cavallini and Co.}

{My FAVORITE page! I made the banner with the Maya Road Chipboard, Heidi Swap Letters, Donna Salazar Ink, and then embossed them so they are super glossy! Just like the Ice Skating rink surface!} 

{The plastic film tape is Prima}

{I am in love with these Transparencies! It has been a long time since I used them, but now I can't wait to get more! They go great with handpainted and stamped backgrounds- the stamp is Stampendous Cling Fresh Bloom}

So there you go! As you can see I really got into this project! I threw all my favorite techniques at it and had a blast. But the start was the pictures- my Instagrams, I really hope you will try Printsagr.am out!