There is nothing better than a Handmade Party! And today I am going to show you how to make a super cute Party Hat for your Birthday boy and some little party favor boxes to match using Imaginisce paper and embellishments along with my favorite adhesive, Xyron.
Let me show you how I constructed my Party Hat!
Start by cutting three 12x4 inch strips of Imaginisce Paper-"Day in the Life":
Measure your little ones head, then subtract 1/2 inch
I measured 20.5 inches, so I did some math and figured out for 4 even pieces would be 5 and 1/8th inch-Then I trimmed them from the 12x4 strips
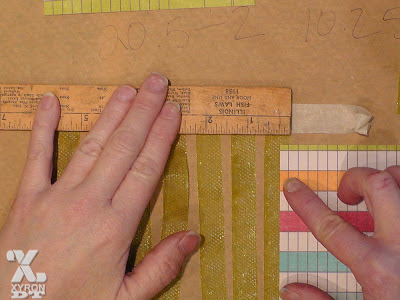
I used ribbon to attach the pieces, so I trimmed 8 strips of 1/2 inch wide ribbon at 6 inches each
Then I tape down the ribbons to prep for adding my adhesive
I used my Xyron Mega Runner with 1/2 inch adhesive, and ran it down each strip
Now, attach one edge of one of the panels, to the ribbon- in about a little less than a 1/4 of and inch. You basically want enough room for both panels to be attached and a small space in the middle. Attach to all four pieces-on only one side for now. Reserv the other 4 strips of ribbon for later
Now, you want to curl your paper to get the round shape we need. I use the edge of my ruler. And I curl using alternating side of the papers
Now its time to assemble the crown.
Attach the pieces together, just like this, leaving a little space in the center.
Take one of the left over 4 strips and attach over the top on the inside and press firmly
Trim the edges off
When I go to close the last panel I use a spray can cylinder underneath, so I have a surface to press against.
Now you should be looking like this!
Side view
A little tip when I am making crowns: use a cereal bowl to help prop it up while I am decorating
voila!
Now I am going to add some stickers from the "Just Be Little Icon". Tip: if the back of a sticker will show-ink it!
I added one sticker strip in the front from the center, and the next in the back trimming it to size.
I then attached a Pom Pom trim-using Imaginisce Hot Glue-best for a heavy trim.
Now for the embellishing!
First we are going to make "Glitter Crepe" ! Grab some crepe paper and your 5 Inch Creative station and run a 12 inch long piece of crepe paper through it. I like to run two to save adhesive (I just trim off the other one and save for another project)
Gently peel back the crepe paper, gently!
now lay across your glitter catcher and start in the center, dousing generously with glitter
Tip: Use an old blush brush to run along both sides to make sure thoroughly coated with glitter
Now fold back and forth in 1/2 inch increments. It should look like this- it may still get a little stuck together but you can just pull it apart.
cut a little half round piece of scrap cardstock and coat with some Xyron glue stick
attach to back of glitter crepe fan
There ya go!
I attached with some hot glue and stared embellishing with This Moment Sticker Stacker:
Add in the Happy Birthday with the Sticker Alphas
and Chipboard:
another Hide and Seek Chipboard birdie
Then added more stickers here...
here...
and here...
and finally a sweet little May Arts Bow
Now what's a Party without a favor? I kept it short and sweet with these cute craft store bought boxes. I spray painted the lids white, ran strips of Memory Lane 12x12 through my 2 inch Xyron Sticker Maker. Then I stamped some of the adorable images form the Childhood memories collection onto white paper circles. Then ran them trough the sticker maker. I attached everything then, ran my mega runner around the lid and attached some May Arts Grossgrain trim. Tip: instead of using just store bought crinkle fill, cut your own using tissue paper and scraps from your project!
Fill with candy and enjoy the Party!
You can see the whole Childhood Memories line from Imaginisce HERE!


