Showing posts with label Petaloo. Show all posts

Thursday, February 12, 2015

Make it Yourself- with grocery store Valentines candy


Need a quick and easy valentine gift for a friend, loved one, family member or teacher? Look no further than the Valetines candy display at the grocery store- pick up a few inexpensive boxes and go to your stash and make some really cool "kinda" handmade Valentines. here are a few of my Snapguides to show you how-

Check out How to Make a Tic Tac Valentine by Denise Hahn on Snapguide. Check out How to Make an Upcycled Valentine by Denise Hahn on Snapguide.

Saturday, June 14, 2014

*Giveaway Alert* Come and see what I made this empty box of Brie into @ the Petaloo Bl


Stop by the Petaloo Blog to see what I created upcycling this Brie Box and enter to win a prize package from Quick Quotes and Petaloo! Today ... we continue our fun Blog Hop featuring "Calypso" and "Serendipity"paper collections from Quick Quotes along with the Burlap & Textured flower collections from Petaloo!!

Thursday, November 14, 2013

A Very Personal Craft Project


Today on Graphic 45's blog I am sharing a very personal project. I had my Dads glasses after he passed away in just a little shadow box sitting on a shelf in my Craft room. I decided to make more of a memory box shrine for them and you can see it on G45's blog today HERE!


Thursday, October 31, 2013

Bringing Instagrams Alive with Maya Road and Xyron (and $10 off Prinstagrams!)


Do you remember the good old days when you popped a roll of film in your camera, no previews, you got what you got? You took the film down to the local grocery store and dropped it off? You excitedly returned, flipping through the alphabetical order packets to find your 3x5's? A lot has changed! I can tell you I have 14, 437 photos on my computer and maybe a handful I have actually printed! I was recently able to recapture that excitement as I decided to get some of  my Instagrams printed for the first time. I researched and decided on Printstgram. I downloaded the app to my phone and it easily walks you through the ordering process. Getting them in the mail was almost as exciting as running to the grocery store! I laid them all out in their glory and they created the perfect palette for my Maya Road Album. AND PRINSTAGRAM / Social Print Studio IS GIVING ALL OF MY BLOG READERS $10 their first order !!! Yep! Just pop them an email at hello@socialprintstudio.com and tell them "Xyron Sent Me!" and Jenny will send you the promotional code! I got 48 of the 2.5X2.5 Mini prints and after shipping was around $20- so yours will be around $10! What a deal!


 Sometimes facing blank chipboard can be a little intimidating-so I used the photos as my guide for color and composition- So come along and see how my little Prinstagrams and my Xyron 2.5 Inch Create-A-Sticker have become my new match-made-in-heavan favorite technique (see video)!
{I started with the Maya Road 3 Ring tab book}

{For the cover I used Maya Chipboard Alphas "Lisa" that I dyed using Donna Salazar Mixed Media Inx in Schoolhouse Red- also on the page Maya Road Heart Tins and Maya Road Our Town Transparencies Black. You will also see a little October Afternoon paper and Alpha Stickers in there too}

 {My entire chipboard Album was painted in Acrylic paints first. I then added depth by rolling my Clearsnap Roll-A-Graph Word Words-using grey Pigment ink}
{Inside I glued down my paper then coated it with Diamnd Glaze-I cut out the little heart from some craft store sheet cork- I made my own little Red Stick pins. I just dipped them in Surfacez red ink, and snipped them to size. I snuck in a little Petaloo Mini Daisy in Grey}

{I used a Martha Stewart Punch for the snowflakes then I embossed them in black}

{At first I was perplexed about how to use the little buildings-but transparencies were made to go over hand painted backgrounds! With My Xyron Create-A-Sticker you can't even see the adhesive can you?! Also on this page is some Washi sticker paper from We R Memory Keepers.}

{When I was done, I noticed my book was kinda flat! I like my albums to have a little chunk to them! So I sniped some little chevron straws and used them in between the pages to make them stand up better-then I used them on the outside binding ring to keep my embellishments forward}

{here I used Maya Road Love Chipboard Banners  and Arrow Pins covered in the We R Memory Keepers Washi paper. Don't Forget to decorate with your sharpie!}

{I loved using the little Washi Tape accents like they are holding on the photos}

{That's a Smashbook paper clip}


{I added the Petaloo Flowers after I was done, they added a touch of softness and femininity to the album}

{The tape and sticker are Cavallini and Co.}

{My FAVORITE page! I made the banner with the Maya Road Chipboard, Heidi Swap Letters, Donna Salazar Ink, and then embossed them so they are super glossy! Just like the Ice Skating rink surface!} 

{The plastic film tape is Prima}

{I am in love with these Transparencies! It has been a long time since I used them, but now I can't wait to get more! They go great with handpainted and stamped backgrounds- the stamp is Stampendous Cling Fresh Bloom}

So there you go! As you can see I really got into this project! I threw all my favorite techniques at it and had a blast. But the start was the pictures- my Instagrams, I really hope you will try Printsagr.am out!


Monday, October 14, 2013

Stencil Girl and Xyron Blog Hop- Halloween Tag Mini Vid Class today!


Stencils are super versatile and I was so excited that we were teaming up with Stencil Girl! I got the Net Stencil designed by owner Mary Beth Shaw, however if you check out Stencil Girl you will see tons of amazing stencils created by Artists from all areas of art- that means there is a style for everyone. Even though my Stencil was a Net- the first thing I saw in it was Alligator skin. So I decided to use a technique that made the stencil look more alligator-y; embossing. Here are the tags I designed and at the end you will find a Mini Video Class including the technique for gluing over a stencil! Have fun making all those Halloween Projects and don't forget to HOP over to:


{look at that fabulous black embossed alligator skin!}


{I like to emboss over patterned papers to give that extra depth- embossing over a small pattern works best}


Supplies:
Stencil Girl Net Stencil
Xyron 5 Inch Creative Station
Xyron High Tack Adhesive
Xyron Adhesive Glue Dots
Authentique Thrilling Papers and Stickers
Graphic 45 Chipboard Tag Steampunk Spells
Petaloo Vintage Dazzlers Tags
Petaloo Textured Minis x9 Black
Petaloo Fancy Trims Black and Paprika
Embossing Powder: Zig and PK Glitz
Clearsnap Top Boss Adhesive Pad
Colorbox Art Daubers
Colorbox Pigment Stamp Pad Lava Black
Crepe Paper- Party City
Black Tag- American Tag Co.


Monday, September 30, 2013

My Favorite Xyron Tricks with Core'dinations Cards!

Today Xyron is hopping with Core'dinations and I have a fun and easy project today using some basic distressing techniques and some of my favorite tricks using my Xyron machines! These cards are very versatile and can be made for any occasion. I have the sketch for you along with a tutorial with step by step directions at the end!


Supplies:
Recollections Corrugated Cardstock
Tulle


Wednesday, September 25, 2013

Halloween Decor with Xyron, Graphic 45 and Petaloo!

Today I want to share with you my Halloween Door Hanger. Perfect Decor for your front door, although I hang mine inside my front door so I can enjoy it! I made this project from half inch Foam Core, a recycled mirror from the thrift store, fabulous Graphic 45 papers, Gorgeous Petaloo Flowers, and my favorite go-to Xyron products. At then end of my post there is a Video Tutorial for the Mirror Image Transfer technique using my Xyron 5 Inch Creative Station so make sure you check it out!

{I love how the image transfer using Craft Attitude looks so spooky}

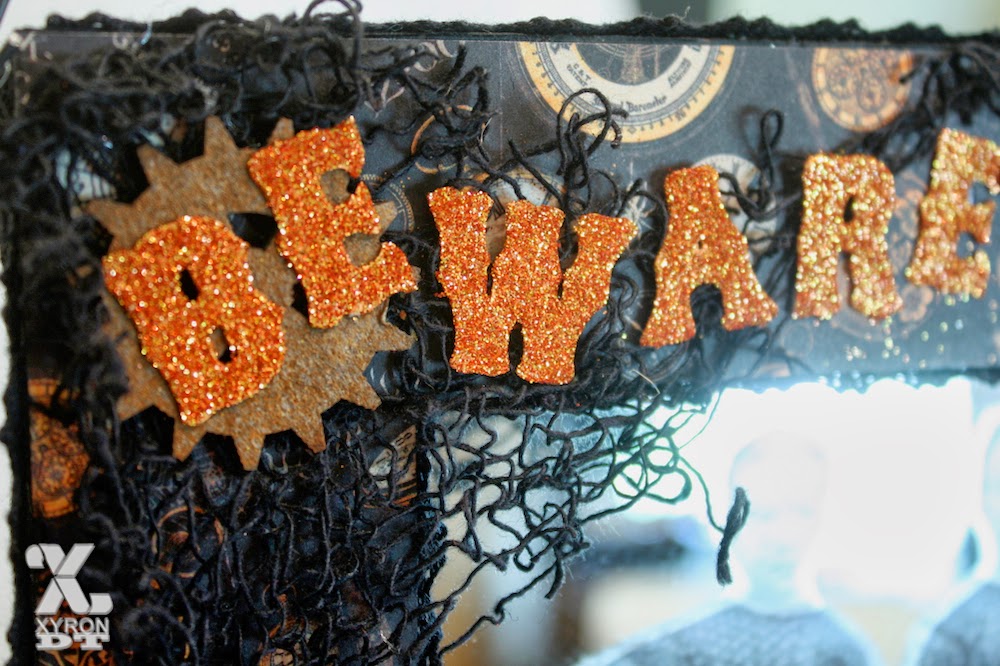
{I was going to have my door hanger say "welcome" but since my twins looked so spooky I decided "beware vintage ghosts" was more appropriate!}

{I used my new Xyron 3 Inch Sticker Maker to glitter my letters- just run them upside down in the sticker maker, then sprinkle with glitter- perfect and mess free (almost!)}

{I used a combination of Petaloos Darjeeling Flowers in Blacks, Creams, Paprika and Greys to embellish the hanger. I used Xyrons new Adhesive Dots to adhere them}

{I also used some of Petaloos Color Me Crazy Chipboard gears. I gave them a spray with Clearsnaps Dye Ink Spritzers in 3 different colors to get the old rusty look}

{I love transferring onto mirror! This mirror had some scratches on it, but I think it worked for the theme. Using the Xyron Creative Station assures no adhesive residue shows through- and I am going to show you how to do it! So here's a quick video on the process and see my supply list for everything you need to make your own!

SUPPLIES:
Xyron:
Petaloo:
Wild Blossoms x9 Paprika
Mini Mix x8 Cream
Clearsnap/Colorbox:
Dye Ink Spritzers-Seattle Sky, Mudslide
Other:
1/2 Inch Foam Core Black
Lace Trim May Arts
Burlap- Joann Fabric
Black netting-Halloween Store
Fonts- Dafont.com Saddlebags and Big Top converted to .svg and cut with Xyron Wishblade