Showing posts with label Colorbox. Show all posts

Friday, October 3, 2014

Easy Recipe for World Card Making Day

World Card Making Day 2014 with the Clearsnap Creative Team

Today is a fun day for The Clearsnap Creative Team- World Card Making Day! Celebrating its ninth year in 2014, World Card Making Day is celebrated annually on the first Saturday in October. It's a day for the card-making communityhobbyists, retailers, and manufacturersto unite and celebrate the connection and creativity that is the heart of card making.  Make sure you check out the Official World Card Making Day site to submit your work and enter to win an amazing prize pack from the WCMD 2014 sponsors (like us!).
Today I am sharing an easy recipe for the beginner card maker. Why call it a recipe? Think of card making as cooking. If your just learning you want to start with an easy recipe. As you grow more confident, you will add in a few tweaks to that recipe. After you have really mastered it, you will start making "dishes" of your own.  Clearsnap has an awesome product for the beginner; Colorbox Creative Cards. Simply decorate the pre-printed cards by spraying or stamping over the design then layering embellishments onto dry card. The best part is you get 5 preprinted cards (5 1/2" x 4 1/4" folded) and 5 blank envelopes. Here is the recipe:
1) Choose 3 or more Colorbox Stamp Pads (all of them will work!) and using a Colorbox Stylus tool and tip- blend onto the card starting with the darkest color on bottom and work your way up blend in as you go
2) Take 1 Yard of Bakers Twine (I use The Twinery) and wrap around card top and tie in a bow on the side
3) Choose a Focal Piece- this can be a Stamp on plain cardstock- a chipboard from a scrapbook paper collection, or even a sticker. Add foam squares to pop it out, and attach to the center of your card. A focal piece should take up around 1/3 of the card space
And that's it! Let me walk you through these three very different cards, that are actually all the same.
{for this card I used a die cut from Authentiques Thrilling collection. The Inks are Donna Salazar Mixed Media Chox in Butternut and Adobe. And Colorbox Chalk in NEW Harvest. The edging is a Colorbox Cats Eye in Wicked Black}


{This Card uses all Colorbox Crafters Inks in NEW Sunshine, Limelight form the Ann Butler Collection, along with  Aruba and Sweet Pea. The stamp (from the dollar bin at Michales) is stamped in Berry}

{As an extra detail- adding in the twist on the recipe- some Smooch Glitz in Pink Fizz on the candle flames}


{For this one a did another twist on the recipe. The Focal sticker I chose from Authentique Be-You-tiful Collection was big and covered the twine, so I moved it up and the twine down- then added in a little Petaloo Flower. I chose some metallics for this one; Starting at the bottom with Crafters Ink in Stone, Colorbox Pigment Ink in Silver, and finally some Twinkle in Pearl}


{This is what the plain Creative Card looks like before getting all inked up}

{Creative Cards comes in all different designs just waiting for you to cook something up for World Card Making Day!

Continue on the hop by visiting these team members' blogs! Leave a comment on each and use the widget below to enter to win a prize pack just for Clearsnap followers!!

  Clearsnap Blog
  Denise Hahn (You are here)
  Meihsia Liu (Go here next)
 Vivian Keh
  Steph Ackerman

Enter our giveaway here (and happy hopping!!):
  a Rafflecopter giveaway

-Denise

Friday, September 19, 2014

Clearsnap and Walnut Hollow Blog Hop- Easy Stencil Tips


My fear of stenciling- real! I always screwed up my project- goops of color in the corners- slippery stencils, color under the stencil. I wasn't about to let stencils beat me, so I practiced. I made a stencil-life-changing-discovery; Respoitionable Spray Adhesive! I use it all the time on my die cut machine carriers- why not on my stencils? And it works- just take a look at my Snapguide at the end of this post and you can see my tips and tricks in action. Today I am playing with some super fun Walnut Hollow French Provincial Signboards. I got a few sizes and when they came, I immediately saw that they needed to be a two tier display tray. First I just base coated them with some white primer, stenciled them with Colorbox Crafters Ink in Aruba and Limon and Colorbox Art Screens Bloom and Rounded  then added in a dollar store candlestick and voila!


Supplies:

Check out How to Stencil With Clearsnap Inks and Walnut Hallow by Denise Hahn on Snapguide.
FOR MORE INSPIRATION CHECK OUT THE CLEARSNAP CREATIVE TEAMS PROJECTS HERE:

Thursday, September 18, 2014

Clearsnap and Fancy Pants Blog Hop Embossed Mini

Oh how I fell in love with Fancy Pants! Today I am working with their Burlap and Bouquets Collection Kit. Visit Clearsnap at HERE and Fancy Pants HERE for more inspiration!

I added to that kit some of their Chalkboard stickers and Tape. The stickers have the texture of electrical tape and I knew right away the best way to use these awesome embellishments- embossing!
{This mini is constructed with drink coasters- the corrugated cover is Fancy Pants Kraft Corrugated Paper}

{This cover is a Fancy Pants Scallop Bracket Chalk Label Sticker, White Clearsnap Pigment Ink and Clearsnap White Embossing Powder- the Stamp is Hampton Art- Footloose}


{For this embossed Bracket Chalk Label Sticker used Clearsnap Top Boss Embossing Adhesive Stamp Pad and Clearsnap Gold Embossing Powder}


Supplies:
Burlap and Bouquets:
Other:
Poppy Stamp- Bicycle
Ribbon May Arts
Adhesives:
Xyron Mega Runner
Xyron Create A Sticker Max


Thursday, August 14, 2014

Clearsnap and Smoothfoam Blog Hop- Fake Ca


Hello everyone!
Welcome to the Clearsnap and Smoothfoam Blog Hop! Hop along to each blog in the hop list to see inspiring ways to use Smoothfoam with Clearsnap’s ink, created by our teams of designers. Be sure to comment on each blog in the hop, then use the Rafflecopter widget at the end of this post to enter to win a prize pack of Smoothfoam and Clearsnap goodies! Today I whipped up a piece of cake for you- but trust me you don't want to eat this one! Smoothfoam, plaster of paris and Clearsnap inks. I made you a Snapguide to show you how it's done!


Check out How to Make a Fake Cake Slice With Smoothfoam by Denise Hahn on Snapguide.
Hop List:
Suzanne Austin - What's in a Lousyananut
Julie McGuffee - Life in the Craft Lane
Jennifer Priest - Hydrangea Hippo
Lisa Fulmer -  Lisa Liza Lou
Meihsia Liu - Simply Paper Crafts
Anita Scroggins - The Flamingo Chronicals  
Steph Ackerman - Live Laugh Scrap
Carmen Flores Tanis -  Flores Tanis Studio
Tami Sanders - tami sanders * paper crafter  
Beth Watson - Beth Watson  
Sabrina Alery - The Honor Roll
Marilyn Gossett - Marilyn Gossett Designs
Denise Hahn - In My Blue Room <------ dessert="" hey="" is="" last="" look="" span="">


a Rafflecopter giveaway

Wednesday, July 2, 2014

Custom T Shirt with Lawn Fawn and Xyron

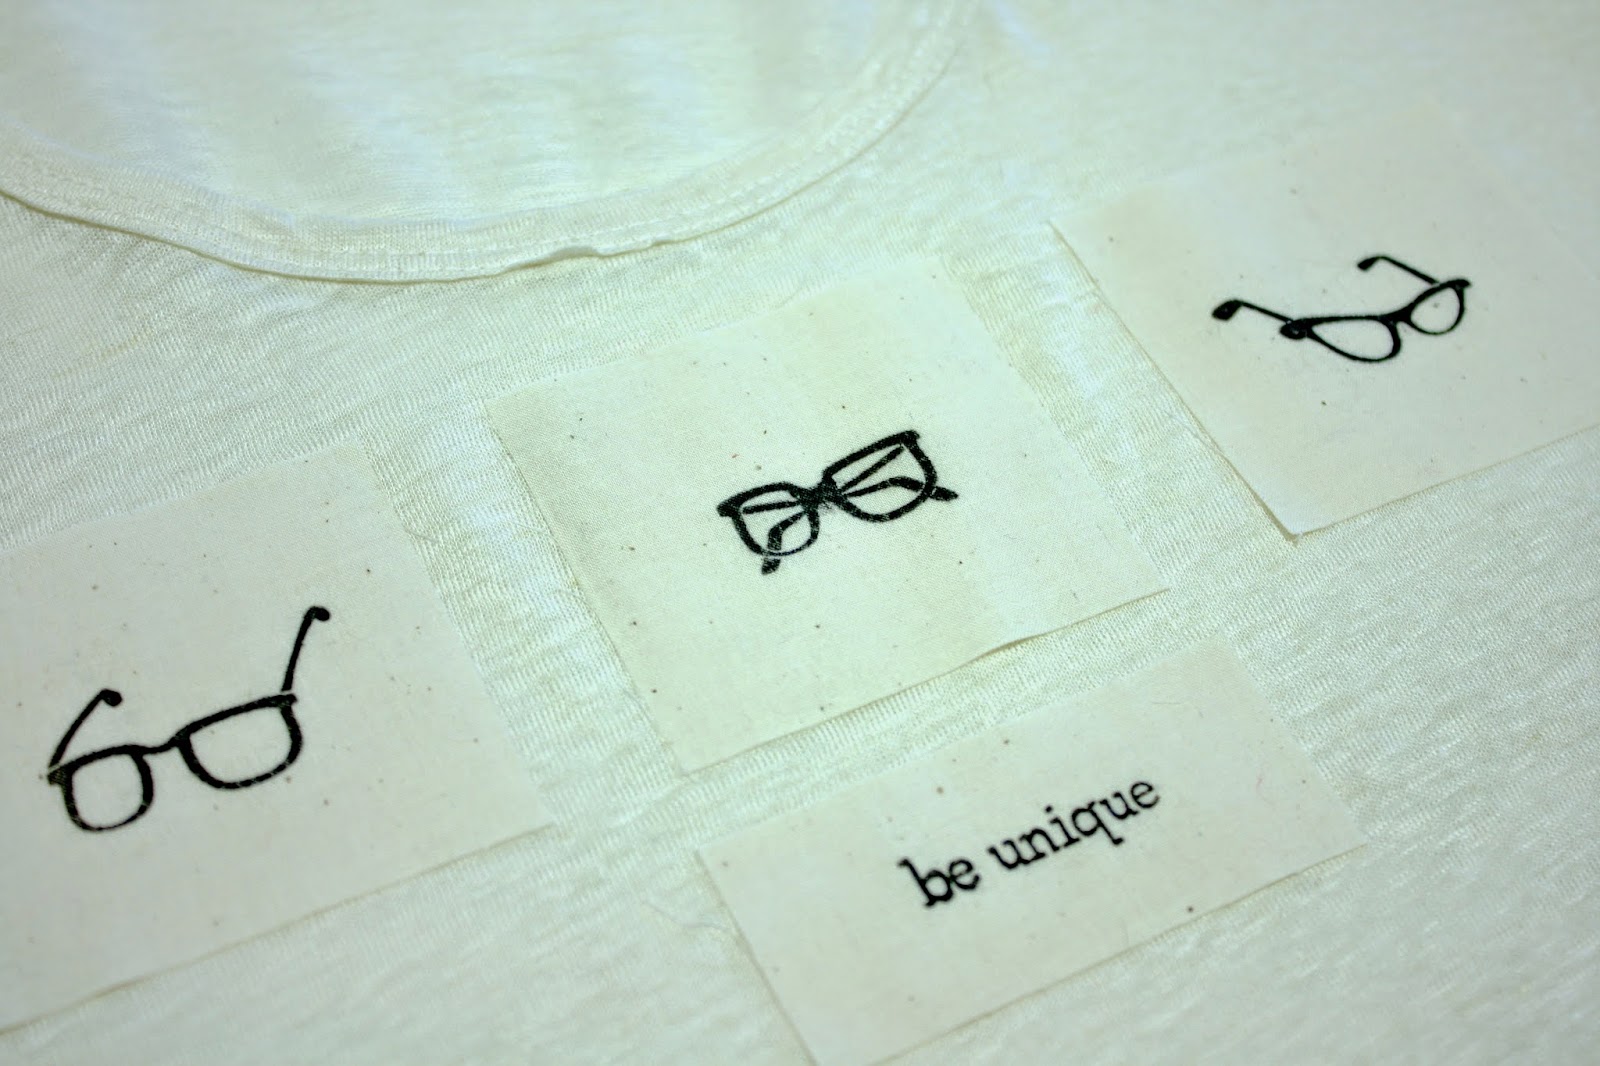
 Sometimes I love a stamp so much I just want to wear it! I love these set of Eyeglass Stamps from Lawn Fawn (Clear to See), they are so me (with my glasses and all!) But to stamp directly onto a shirt can be a little daunting, you only get one shot to get it right. Since I am a little sketchy in my stamping I came up with a great technique using muslin and a Xyron Tape Runner. For this project you will need a shirt, some plain pre shrunk cotton fabric or muslin, some Lawn Fawn Stamps, Colorbox Crafters Inks, Xyron Tape Runner and a seeing machine or needle and thread.
Let's get started!
{Start with your base shirt- really any shirt will do except extreme stretch knits, this is a poly blend.}
{Next grab a piece of muslin and make your stamps using the Crafter's Ink- make sure you leave enough around each stamp to cut into a square (or any other shape)- Go ahead and do multiples, this is the test stage! Then pick your cleanest ones and cut them out}
{You can use pinking shears if you don't want them to ravel, but I like that reveled look!- Very important- Crafters Ink needs to be heat set with your iron to become permanent so press them off for 20-30 seconds}

{Now grab your Xyron Tape Runner and run tape on the backside of your appliqués along each side but not totally to the edge. Believe it or not I have found tape runners to work great on fabric- you can sew through the adhesive, it doesn't gum up your needle, and it doesn't show through when your done!}

{ Now VERY IMPORTANT! Put your shirt on, THEN stick your appliqués to your shirt! Why? Because you want to make sure they are placed right, especially in the chest areas if you know what I mean. You don't want to do all this work and find out your appliqués are hiding under your breasts or on crooked}
{Now go to your machine and stitch around- you can use a straight stitch or play with all them fancy ones you never use- play with thread color- or hand stitch with some embroidery thread would be super cute too!}
{So cute! Who says stamps are just for paper!}
I hope you will try out this simple technique and start wearing your favorite stamps!
-Denise
Sunday, June 22, 2014

Something Tattered Pan Pastel Technique with Colorbox Pigment Inks


Hi everyone, so I am working on conquering my fear of stamping- I love stamps and have quite the collection- but that's where it tends to stop. I collect and admire them but don't use them as much. I think my fear is imperfection- but I think some imperfection is what gives stamps their character- so I am getting over it! I am getting over that fear by really challenging myself by learning new techniques and them applying them to my favorite stamps. Today we are going to do a little pan pastel effect using Gelatos. Here is the finished project and at the end my technique video!


SUPPLIES:
Canson Watercolor Paper
Canson Linen Paper

Sunday, November 3, 2013

Handmade Holidays Blog Hop- Toilet Paper Roll Gift Card Holders


Hi everyone welcome to the hop! I wanted to make a project that was super compatible with using all of the great companies featured today on the hop- so although I didn't use everyone of them- I am adding in some ideas and options that you can use all of your stash for! Let's start by saving all of the toilet paper and paper towel holders. So many cool crafts to make with them! I manage a grocery store in real life-so I am not a holiday shopper-it's gift cards for all. However I do like to give those cards in a unique and fun gift card holder-handmade with love!

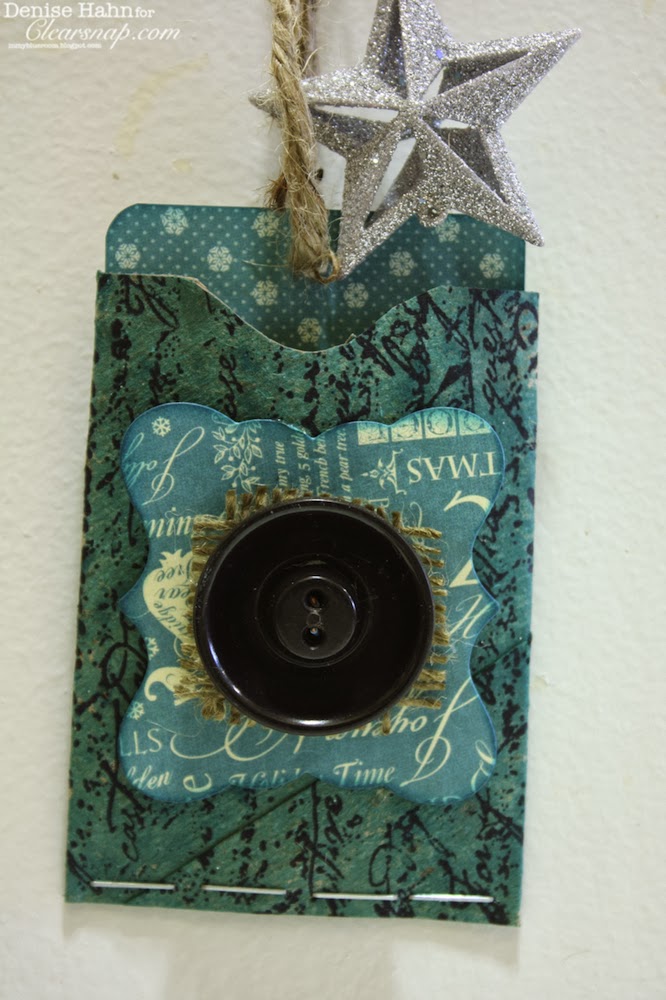
{Can you believe these are toilet paper rolls! I left mine au naturale before I sprayed them with new iZink Pigments. These are imported all the way from France and are being distributed by Clearsnap. You can use any of your sprays including- Stephanie Barnard, and Colorbox Spritzers}

{a single roll will make one holder, a paper towel holder will make 3- just eyeball cutting it into thirds. Flatten and press down with a bone folder- you can seal bottom edge with any glue or adhesive or use a stapler. If you want more true colors and a less rustic look-paint your rolls with a white acrylic base before you spray.}

{For this one i used iZink Tomato. Just drop a few drops with a little water in a spray bottle and spray away. I then used Colorbox Pigment Ink in gold and My First Colorbox Stamps "Snow Day". Use your favorite Sizzix die cut- the Framelits will work awesome. I edged my Graphic 45 die cut shape with Donna Salazar Mix'd Media Inx in Schoolhouse. I layer on a small piece of burlap to echo that natural look then added a vintage button all with hot glue}

{this one is iZink in Opaline-then stamped with the My First Colorbox stamp- I used a stapler to seal up the bottom of this one}

{This one is iZink inTurquoise then stamped with black pigment ink using my Clearsnap Rollagraph "Word Words"}

{this one is iZink in Silver and I used Donna Salazar Mixed Media Inx in Schoolhouse with a Colorbox Art Dauber to make the dots-love these!}

{To finish them all off I used the leftovers from the die cut- cut them 2.5 inches wide and about 4 inches long-inked them in coordinating colors using Colorbox Queties. I used some plain jute twine for the tie}

{I used Graphic 45's 6x6 12 Days of Christmas paper pad. The backs are all solid to make sure you have room to write on your gift card. To attach your gift card just use your tape runner or a glue dot!}


{These little carriers can be hung from a tree too! Hope you have a great handmade holiday!}
4 More blogs to go- you can do it!!!!
Sizzix – Eileen Hull Designs http://eileenhull.blogspot.com/
Nathalie Kalbach www.nathaliesstudio.com
Tanner Bell   http://www.craftteen.com
Jennifer Priest http://hydrangeahippo.com
Vicki O'Dell http://vickiodell.com/
Denise Hahn http://inmyblueroom.blogspot.com/ <----------you are="" here="" span="">
Courtney Chambers http://www.alittlecraftinyourday.com <------go courtney="" here="" next="" span="" visit="">


{\rtf1\ansi\ansicpg1252 {\fonttbl\f0\fmodern\fcharset0 Courier;} {\colortbl;\red255\green255\blue255;\red0\green0\blue0;\red254\green254\blue254;} \deftab720 \pard\pardeftab720\sl360\partightenfactor0 \f0\fs24 \cf2 \cb3 \expnd0\expndtw0\kerning0 \outl0\strokewidth0 \strokec2 a Rafflecopter giveaway\ }