Want to be the Teachers Pet this year? Check out my fun Pencil holder project and video tutorial on PETALOOS blog!
Showing posts with label craft project. Show all posts
Wednesday, August 28, 2013
Teachers Pet!
Want to be the Teachers Pet this year? Check out my fun Pencil holder project and video tutorial on PETALOOS blog!
Friday, August 16, 2013
Fun and Easy Back to School Teacher Gift
One of the things I love about designing for Petaloo (besides getting oodles of gorgeous flowers), is the chance to work with all different craft companies. I love thinking outside the "vintage" box and doing something completely new! So check out my Petaloo and Simple Stories Upcycled Cork Trivet Back to School project on Petaloos Blog HERE
Wednesday, April 24, 2013
Old to New with Xyron, get your Party Hat on!
Okay so I know it's a little EARLY for New Years, but this project can be converted into so many party hats. Xyron challenged us to take one of their older projects (Find the project inspiration HERE), and re-new them using our own creative take. There was a LOT of creative freedom given, all we had to do was be inspired by the older project- and lo and behold- one of my favorite things to make was right there begging to be made-over, a hat! So here it is and all the step by step instructions to create it:
you will need:
Xyron Wishblade (or you can hand cut)
Plastic headband base (available at craft stores)
.25 in Foam Core
Crepe Paper
Marker
Scissors
Xacto knife
craft wire
hot glue gun
A.
B.
Okay so pardon the hairy arms (my husbands!), but you will need help for this first step- YOU MUST bend open the headband before you measure- if you dont, then headband won't open enough to be worn- so put it on your head-get a feel for how open it is, then trace the base circle (A)- then open it BIGGER and trace your top line onto the foam core as pictured (B)
add two end lines connecting the top and bottom line, and cut out with Xacto knife
use this piece as a template to cut our your glitter card stock
run your glitter piece through the Creative station and attach it to the foam core base
place a top your headband and mark the beginning and end point
run a bead of hot glue between the lines
quickly attach base, spreading out the headband to fit- hold until cools
use your glue stick around the edges of hat and attach your trim-set aside to dry
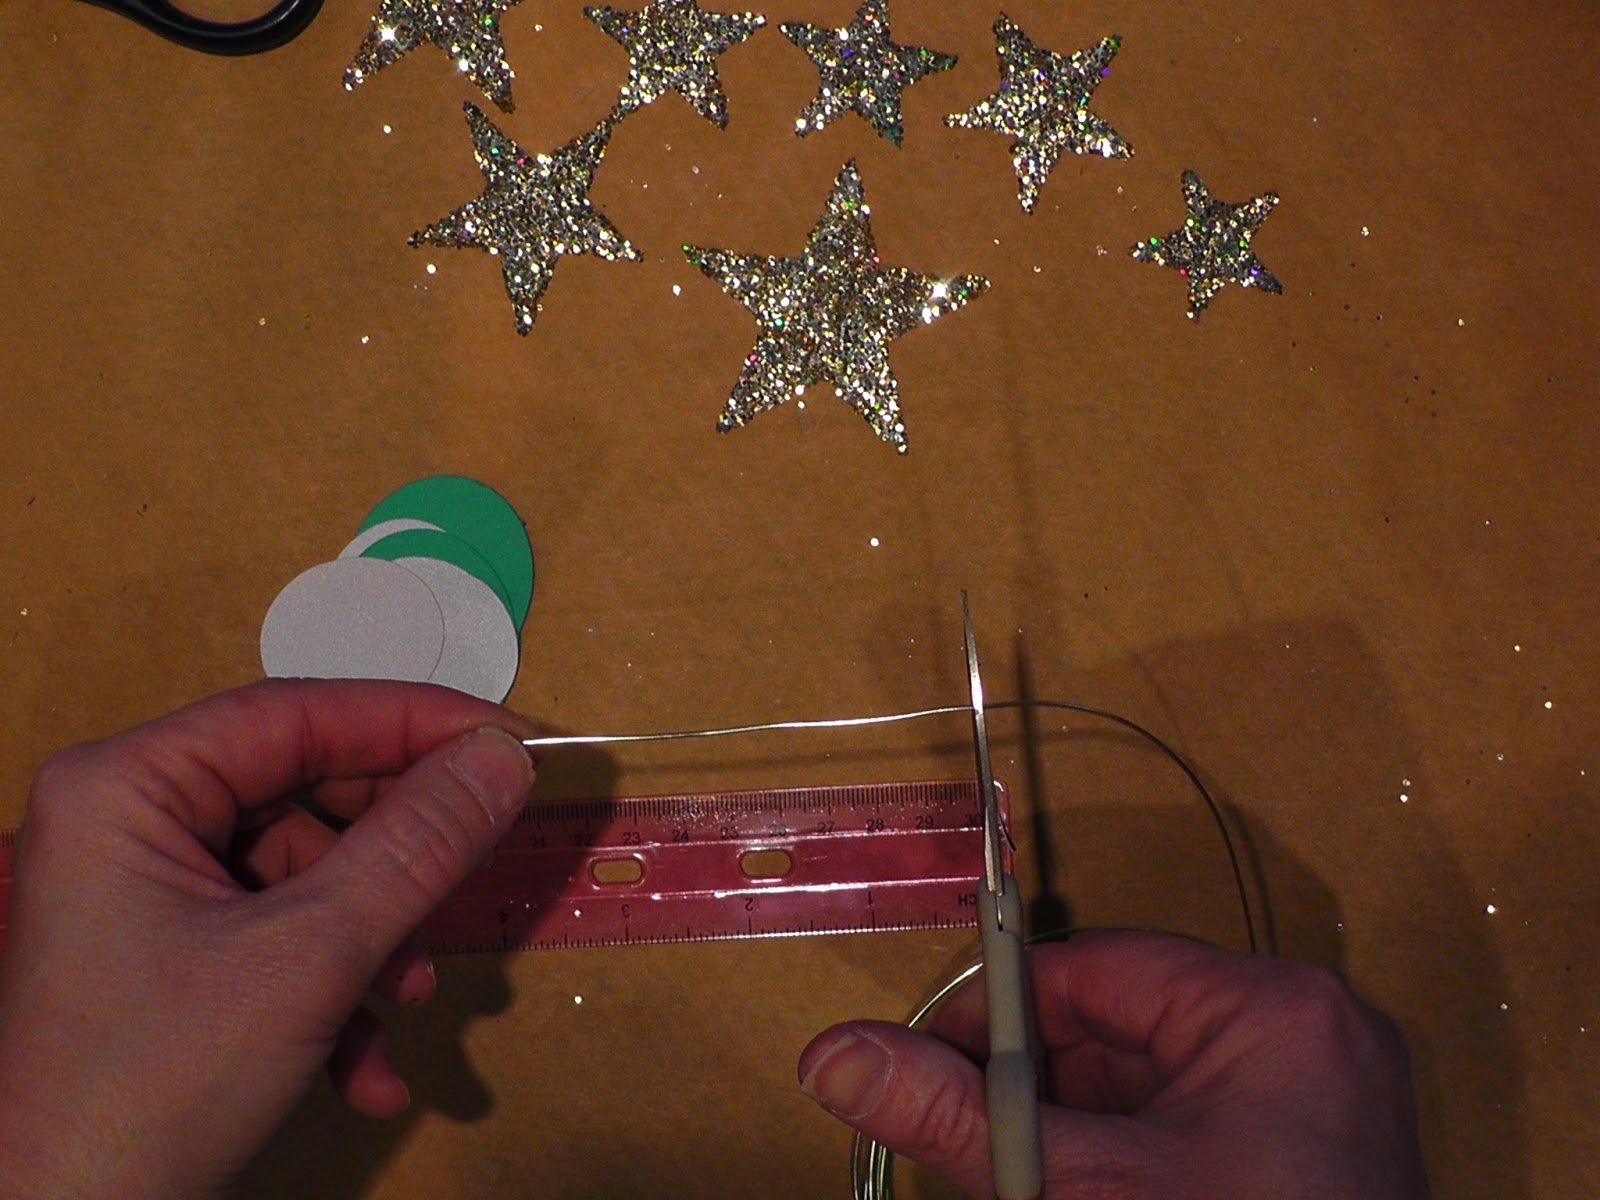
I used my Wishblade to cut out 7 various shaped stars and ran them through the Creative Station
I then sprinkled with glitter onto the sticky side-press down to make sure it adheres
trim 4 pieces of craft wire about 3 inches long
I cut out 8 ovals with my Wishblade- you can cut out any shape you want- but 4 of them should be scaled smaller- so 4 large shapes-4 smaller shapes- run them through the Creative Station
Take your first largest Shape and stick a piece of wire to the base-sticky side up (A) then take your smaller piece and attach it sticky side down (B) Press firmly down encasing the wire-yes you will have sticky still showing (C) Dip the stick edge in glitter and press down. Attach your YEAR numeral stickers and repeat for each number (D)
Accordion fold 12 inches of crepe paper and then trim 1/2 inch off (you may need to trim more or less depending on size of hat)
run glue stick on base and attach crepe. I also attached an extra piece of trim to cover the base-using hot glue
Now for a really cool trick- I sued my Mega tape runner and some left over backing for my creative station, to make my own foam squares. Just cut a strip of foam core, run Mega runner on one side-stick to foam core and cover with leftover Xyron backing. Flip over and do the same on the other side. Voila! now just cut to size as needed.
attach foam squares to back of stars and attach to headband
insert year numbers into top of hat
make some extra curliques with the craft wire and insert into foam- you may want to add some hot glue to the base to keep in place.
Ta da! You can even save this one and just change out the year!
Hope you have fun with the Old to New Project!
Please visit the Xyron blog for more old to new projects@
Tuesday, August 28, 2012
Picture Frame Tutorial on Clearsnap Today
Pop on over to the Clearsnap Blog for a fun technique using Stephanie Barnard Sprays. It's Back to School!
Friday, July 27, 2012
Graphic 45 Want2Scrap and Art Glitter Blog Hop
Hey there Graphic 45 fans! One of the perks to being on a Design Team is getting goodies from partner companies to create with. This month I got amazing products from two companies. Want2Scrap and Art Glitter. All I can say is when I opened the Art Glitter box the colors just screamed Halloween, so I whipped out my Happy Hauntings paper from G45. And the Want2Scrap goodies I have been using all along... and I used one of my new favorite techniques-altering rhinestones with alcohol ink! So here is my Halloween Art Terrarium. This project is so cute for Halloween decor, but it's challenging to photograph! So I hope you get the "feel" for it!
Clearsnap Heat Emboss and Distress Ribbon from Denise Hahn on Vimeo.
{this is a plastic dome display that is 4x6 inch. I started by glittering the base with Art Glitters Dazzlers in Aphrodite Hexis }
{I then took some 3/4 inch black foam core to make a base-then trimmed that base with Graphic 45's Happy Hauntings paper. I then fussy cut out some of the other images from the paper line-attached them to wood skewers and inserted into the foam base}
For the outside I used Want2Scrap Silver Rhinestone Swirls- but wait! Those aren't silver! No problem just dab a little Ranger Alcohol ink in eggplant and you have instant purple rhinestones!}
{I had this broken vintage porcelaine figurine, I knew I wanted to save her for something!}
I also used a G45 chipboard clock-a vintage key- it's a great medium for displaying some of your unique found objects that might be too bulky or heavy to add to a paper project}
{here is a vintage watch part bottle I converted into a witches brew ingredient, and a lovely vintage purple clip on purple pearl earring}
{another angle}
{I also made this spooky hat pin from a skull bead and two vintage beads salvaged off some broken jewelry- just glue them on a pin and insert into your foam base}
{I love this bewitching beauty for G45! I glittered her up with Art Glitter in Copper Harbor}
{way in the back is my man in the moon cut from G45 and Glittered with Art Glitters Wildwood- this is an amazing mix of silver, lavender and orange glitter- gorgeous!}
{Finished it off with a distressed organza ribbon you can see my tutorial here on how I get this effect:
Clearsnap Heat Emboss and Distress Ribbon from Denise Hahn on Vimeo.
{I cant wait until fall when I can start putting out all of my halloween decor!}
{here is a pic of the inside with the globe off}
{this is the globe off the base-you can see the detail a little better}
Please remember to comment for a chance to win these amazing giveaways from Graphic 45 and dont forget to visit Art Glitter and Want2Scraps blogs for more chances to win!
here are the other hops today->
Laura Denison: http://www.followingthepapertrail.blogspot.com/
Susan Lui: http://luv2scrap-pages.blogspot.com/
Subscribe to:
Posts (Atom)