Sunday, September 23, 2012

Bathroom before and after! In My Blue Bathroom!

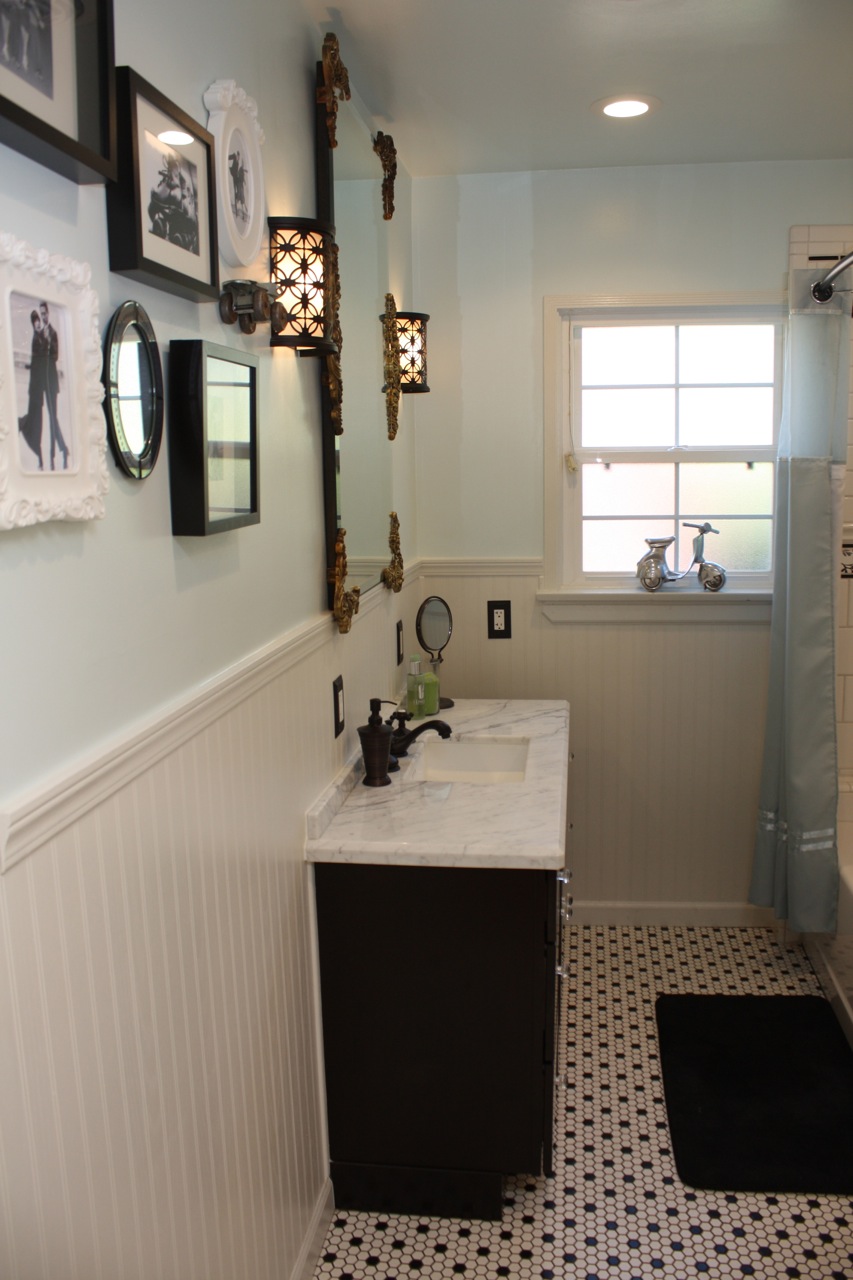
Yes, it's finally done, well it was done a while ago but today the planets aligned and it was clean and I was in the mood to take pictures. I am so proud of the job my husband did on this. So much of what he did you can't see. He took this thing down to the studs and redid it. New wiring, lighting, and plumbing. Not to mention dealing with a 1941 lathe and plaster house. The worst part he said was jackhammering out the two layers of tile on the floor, then building the entire floor back up. Gee all I had to do was come in and make it look pretty! Suprisingly there were not very many fights, we are pretty good at compromising- the big issue was over my mirror. I love my 1970's vintage mirror I found at LB Flea, but it was too big. I demanded everything be returned, exchanged and removed to accomodate my mirror! He said he was not remodeling a bathroom around a mirror. Little did he know!  I did have to give up the cool sculpted original mirror and had to go and have a smaller rectangular one cut and beveled- but it was the gilded corners I loved, so we just swapped them onto the new mirror ond voila! So here it is!


{yes I am missing a glass knob and got lectured on buying more than I need, always!}


{The glass knobs looked great on this otherwise modern looking vanity}


{a mans castle! I love the little basket I found at TPT Home}

{we are going to add another hook on the bottom and maybe one right outside the shower. I didn't want any towel bars..I don't know why- I just like the clean look without them}

{My wall done in IKEA picture frames and Vintage Rollerskating Photos}

{Ahhh my glorious mirror- I wish you could have seen it with its original mirror, it had a scalloped edge. I still have it, so maybe for another part of the house!}

{This tile came all the way from Australia, again was the only one we could agree on. They were like 20 bucks a tile, and that a lot for my cheap ass!}

{our new shower, it actually has water pressure so I can rinse my hair!}

{his and hers soap dishes}

{my faucet and marble top}

{how friggin cute is my little vintage skate up there!?}

{I also love Vespas and could not pass up this aluminum one at TPT Home..what does it have to do with my bathroom or skating? Who cares i LOVE it!}
{This just makes me smile. I love this bathroom and now it will be really hard if we ever move leaving this behind!}
Thanks Daddy! (<----Tyler Hahn)


Monday, September 3, 2012

Jewelry Project and Tutorial on Graphic 45 today!

Birdsong is my favorite new Graphic 45 collection, so I just had to make some jewelry with it! Pop over to the G45 blog today to check it out~

Tuesday, August 28, 2012

Monday, August 27, 2012

My Stamp Box- makes me giveaway a favorite technique!

Okay, so one of the reasons why I love being on Designs Teams is to share ideas and techniques with people. I love coming up with a great idea, then spreading the word and sharing it with everyone, but there is a little technique I had hidden away...until now. I am revealing my DIY Dymo tape technique! What got me thinking about it was this project for todays Blog Hop with My Stamp Box. I got this amazing big Polaroid like picture frame stamp. And I am like... "I will make my own REAL polaroid picture!" The technique I used is pretty much the same for that as for my dymo tape. Start with a realistic base, then emboss the heck out of it! Here is my sweet little 8x8 layout featuring Pipi and may now TWO favorite "realistic" techniques!
{Here is the finished Project}
Instructions:
Cut an 8x8 and 6x6 piece of card stock- ink edges with Clearsnap Pigment ink in White Frost
attach offset to right

Stamp off the Camera, Oh Snap! and Paperclip onto white card stock and trim out 
(Pixel Perfect from My Stamp Box with Clearsnap Stephanie Barnard Ink in Guava)

Stamp the large polaroid stamp onto white paper with Clearsnaps Pigment Ink in Frost White, then sprinkle Clearsnap white embossing powder on top and heat emboss. Cut out embossed fram and mat your photo behind it with adhesive

Tie a piece of May Arts twine around base

Then attach pink stamped pieces and polaroid to your background- I added a little hot pink bow for flair!

Then make your fake Dymo Tape:
First you will need the font- go to dafont.com and download the free font "Impact Label" 
Print it out, do not go smaller than 14pt, the bigger the clearer it will come out. Then take some emboss gloss and coat over the top of your printed out words.

I go heavy making multiple passes and add more powder while the powder I just heated is still warm and grabs. Wait until it completely cools and then trim it.

Add it to your project- be careful not to snap it! Glue it down and if it snaps, you can just hit it lightly with your gun again-but try not to!


I wish you could really see how much the stamped polaroid frame look REAL! I have a feeling I will have this stamp out a lot. I love the retro feel it gives, with out the retro camera!


Thursday, August 23, 2012

Crown Bracelet Bar Class


Okay so I had my first "Bar" style class---- no kit I just bring my portable bead shop and you make your piece however you want. I have to say, it worked and with great success! Not only did not one Crown Bracelet come out the same, I saw some new ideas and color combos from these talented ladies. I have another class in September and will also be holding one at Crafted at the Port of Los Angeles, thanks to Jennifer Priest from Hydrangea Hippo. Please contact me at Inmyblueroom if you are interested in attending! Here are the pics. Thank you to Andrea Villareal for being the amazing hostess she always is!
{the bar all set up and ready to go!}

{I know I said no kit, but I cant resist personalizing!}

{Findings Galore!}

{a little chain is all you need!}

{Andrea just always has the cutest table settings-Organic Milk Chocolate Truffle Bars-are you kidding me!}

{Each student gets two starter crowns, and a sliver platter to design and collect on}


{I love Andreas decorating style...creamy, ocean, blues...yumm}

{shopping at the bar}

{Finished projects}


{LOVE these creations made by the attendees!}

{Andrea doing her Close to My Heart demo-have you seen their stuff? I dropped a few bucks myself!}

{More creations, I just love this red and blue!}

Again, I have a few more classes lined up, contact me for info!
Denise