Tuesday, December 17, 2013

30 Days of Crafting! Embossed Candlelit Houses

xmas trickle lights on Make A Gif
make animated gifs like this at MakeAGif

Okay, so yeah... I love making little houses! I can't help it! These are super super easy and a quick way to add a special touch to a centerpiece, mantle or bookshelf. I used the super fun amber flickering battery candles, you can find these at any craft store. Now let's get to it!
You will need:
4- 6x6 Pieces of sheet music or book pages (use new-vintage will not emboss or fold well)
Xacto knife
Pencil
optional:
Elmers Glue or Modge Podge
Small Paintbrush
Glitter

Cut out and emboss 4 pages of sheet music I used Embossalicious Christmas Elegance by Crafter Companion

I used my Creatopia to emboss and this is my "sandwich"-follow instructions for your embosser

Next I used my Colorbox memory Essentials Stylus and my Colorbox Ink to brush out the highlights on the embossed paper

next "eyeball" fold over, overlapping about 1/4 inch

Like so!

Now, watch carefully-I then meet the two folds I just made in the middle, and press down again. There is NO adhesive yet-we are simply making folds so we know where to cut our windows

Grab a piece of scrap chipboard and cut out a window template-free hand it! You can do it!

Now on each of the 4 sides-trace out your window, varying the heights-but not too low or too high!
OPTION: before you fold up take your brush and glue and LIGHTLY spread some glue on the inside and sprinkle with glitter

Now we are ready for adhesive. Run a line down the "extra" edge

now fold it back up again

fold back out to for a square

Close up the top, like wrapping a present

grab your stapler-and close her up!

When you open it back up- you can use a pencil end to straighten up the sides- you can create different house shapes by simply pushing the folds up higher or leaving them low

Finished! Now just pop it over a batter operated tea light

Or on second thought- hopefully you saw my option above and already added a little glue and glitter- I used a paintbrush and just dabbed some glue in and spinkled my glitter in- I just found it glowed a little more sparkly that way!


Look how cute they all look together!
-Have fun and Happy House Building!


Monday, December 2, 2013

Heidi Swapp Color Shine Wreath- With Xyron

Okay so I LOVE making banners, and when Xyron Teamed up with Heidi Swapp this month and sent me some Color Magic Jumbo Pennants- all I could think of is how not to do the "obvious" banner! Well lo and behold these pennants make a great wreath too! I LOVE LOVE Heidi's Color Shine Bronzer- truly amazing I can't really explain it- but it sometimes looks gold, sometimes looks silver, and sometimes looks bronze. Just really beautiful depth in this spray. So let me take you a bit through this project to get you started, then you are on your own to embellish away!

{First I sprayed all of my pennants with Heidi Swapp Color Shine Spray in Bronzer- I used a sponge to spread it around}

{I used a paper plate for a template and cut out a piece of chipboard and then some of Heidis cardstock "Believe Santa Baby"  to cover it and attached using my Xyron Mega Runner

{After my Color Magic Jumbo Pennants dried I run them through my Xyron 5 Inch Creative Station with permanent adhesive}

{I then stick them to some heavy card stock- if you don't they will curl and not stand up to being hung vertically}

{I then inked all the edges with ColorBox Silver Pigment ink- there is NO BETTER metallic ink in the universe!}

I then used Aileens Tacky Glue to attach the pennants to my back piece. Why you ask? It needs to be super strong to hang vertically AND you have "play" time to get them arranged just right- no doing that with sticky back adhesive or hot glue}

{Okay so now you can embellish how you wish, but I will show you how I made my tree! Cut 4 to 5 4x6 Inch pieces of "Believe Peppermint Sticks" paper and then score longways at the center mark}

{Then trim from the top of your scoreline to the bottom corner to create the tree shape-trust me way easier to score first then fold-trying to fold the tree shape after you cut it is a pain!}

{Grab some of the awesome ColorBox ink and ink it up!}

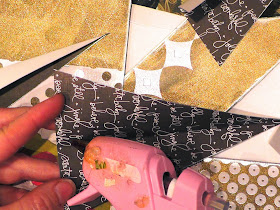
{Run a bead of hot glue up the center line and just keep stacking them up!Then fan out to create your tree!I used Heidi's Color Magic Pressed Paper Frames sprayed with more Color Shine Bronzer and her "Believe Jingle All the Way" paper to finish off my design. Here is what I did:
{ I cut out some big letters and glittered them with recollections Fine Glitter in red and attached with Teresa Collins Foam Squares}

{Here is my tree and a few of Heidis Color Magic Flowers sprayed with Color Shine Gold and Bronzer- there's a little Petaloo one in there too!}

{here I just backed the Pressed Paper Frames with the Jingle All the Way paper.You can see in this picture how cool the Color Shine Bronzer Looks-gold and silver all together!}


\


{I love how the Pennants have Silver highlights- I just happened to be wearing an orange sweatshirt you can see glowing in the silver part!}

{Such a fun project and the colors you can do this in are limitless with Heidis Color Shine Sprays! How bad do I want THIS for Christmas!}
Happy Creating to you!!!!